Sunday, January 30, 2011

Sunday Spotlight

Hey! It’s time again for Spotlight Sunday!

Here are a few of my favorites for the week from the blogs I follow!

From Delia Creates, learn how to make your own lip gloss!

image

From “You Seriously Made That”, the cutest headband!

image

Cute little shoes with a tutorial from “Leafy Tree Top Spot

image

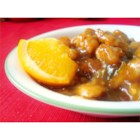
Fried Avacados with Salsa Ranch Dip. From “Or So She Says”. I haven’t made these yet, but they look yummy!

image

Here’s the Linky Party for this week!

..just remember!

1. Link anything you have created.

2. Link your actual project post. Do not link to your main blog, shop, or etsy store, not to any giveaways or anything else.

I would appreciate if you linked back as well, not a must, just a request!


My Swanky Crafts
<div align="center"><a href="http://www.myswankycrafts.blogspot.com" title="My Swanky Crafts"><img src="http://i1095.photobucket.com/albums/i480/ashleedunlap/BlogBUTTON-SS.jpg" alt="My Swanky Crafts"

style="border:none;" /></a></div>


Friday, January 28, 2011

Brush Stroke Mod Podge

I was helping out in Activity Days last week, teaching the 8-11 year olds and their moms how to decorate cupcakes with a star tip. I had a blast, probably more fun than they did! They all did a great job though! So, besides cupcake decorating, they also did this little craft. I asked how to do it, and the sister let me try it! I can’t wait to buy some and do some more pictures of my kids on canvas!

It’s a brush stroke ModPodge over some pictures.. really easy.

These are the pictures I did.

IMG_4545 IMG_4549

IMG_4551


It is really neat looking when it is all done! (I don’t know if you can tell here very well what the finish looks like, but it’s the best I can get!)


IMG_4548


You can get the mod podge from any big local craft store, but make sure you have your coupon! Make sure you buy the one that says “Brushstroke” on the bottle! You’ll also need a small 1/2” or so, bristle brush.


image

Streak the mod podge on in long strokes, just to get the picture covered at first, then you can go back over it in just little “x” like strokes to cover the whole thing. If you drop a hair of the brush, just pick it out with your fingers and brush over that spot again. It is very forgiving and you can put a couple layers on. My picture bubbled up a little when it was wet, but as it dried, it flattened back out!

If you use this style for photo pictures, you do need to seal the picture first with some kind of Clear Acrylic Sealer (there are lots of different brands), but if it’s just a picture like the ones I have here, you can go right for the mod podge.

IMG_4586

IMG_4603

Color is bad on this one, but you can see the brush stroke better on it.

IMG_4591

Linked @:

mmm buttonThe Girl CreativeMakingKeeping It SimpleLINKPARTYBUTTONNightOwlCraftingCraft Goodies


BACK TO TUTORIALS!

Tuesday, January 25, 2011

“Hoo” Are You??

NightOwlCrafting

1. Do you wear glasses or contacts, if so for how long?

yes and no. Yes I have them, but no, I don’t wear them. I got my first pair back in 6th grade and thought I was so cool.. then my vision corrected itself a bit, so it's not as bad. Mostly I'm suppose to use them for reading and night driving, but I don't really do that either. I should probably my eyes checked again now that I think about it! ;)

2. What was your favorite board game as a kid?

I don’t remember. Monopoly probably. Now it is Settler’s of Catan, or Ticket to Ride!

3. What is a word that you use all the time?

Hmm.. let me think about what my son uses all the time, maybe that is from me.. “Sheesh!” I guess is one. hehe..it’s funny to hear my 3 year old saying it!

4. What is your favorite day of the week?

Sunday I guess. Go to church , then get a fresh start on a new week! I love the feeling of a fresh start!

5. Did you graduate high school from the town you grew up in?

We moved to the town where I graduated from when I was in 8th grade. So I was 13. I don’t know if that means I grew up there, or in TX where we lived before. I would claim Texas any day! ;) but I guess I did most of my growing up in my teen years, so I would say yes, I guess.


Back to "Hoo {Am I}"

Fence Post Snow Men

So this one is actually of my own creation! My mom has a scarecrow and a witch that are adorable, so I wanted to make something for winter. Easy Peasy…
IMG_4568I bought a fence post from Home Depot..not the normal ones that are like, 4x4, but the ones outside that are not exactly square, and they are a bit more rough. They are only about $4 instead of $8 like the 4x4’s.

I had them cut it for me (so I could fit it in my little car). I think I had them cut it to 1 @ 4 foot and 2 @ 3 foot. When I got home I sanded the boards down with my palm sander and painted them..white!

IMG_4556

I had some felt on hand, just enough black actually. I put a piece of square over the top,


IMG_4557


Then wrapped another piece around for the top of the hat.


For the brim, I ended up just folding a piece and rolling it basically. Using hot glue I glued it all down. I did do the two brims slightly different though!

IMG_4560IMG_4562

I had another piece of scrap IMG_4567wood on hand that I painted and used as my base, so they won’t fall over. I just tipped them upside down and put a few screws in the bottom of each (the short one first). Long screws so they will be sturdy enough to hold up the weight.

I had the buttons and googly eyes on hand as well. So out of pocket this project really only cost me the $4, well $2 if you count a bottle of paint. I do want to cut some wooden noses out, probably later this week when it warms up outside and paint them, so as of now, the noses are temporary, and I do have some fleece I want to use for the scarves instead, but it’s hiding in my kids room, and they are sleeping! Other than that, I love the way they look on my front porch!


Thanks for stopping by!

Ashlee

Linked up at:

mmm buttonThe Girl Creative

Tasty Tuesday - Asian Orange Chicken

I made this dish last summer for my grandparents, and the totally LOVED it! I was excited because my grandma is one of the best cooks I know. They said it was better than Panda Express.


Asian Orange Chicken

recipe image
Rated: rating
Prep Time: 40 Minutes
Cook Time: 40 Minutes
Ready In: 3 Hours 20 Minutes
Servings: 4
"Enjoy delicious citrus chicken marinated in lemon and orange juice with brown sugar, vinegar, soy sauce, garlic, and ginger. It's terrific served with rice."
Ingredients:
Sauce:
1 1/2 cups water
2 tablespoons orange juice
1/4 cup lemon juice
1/3 cup rice vinegar
2 1/2 tablespoons soy sauce
1 tablespoon grated orange zest
1 cup packed brown sugar
1/2 teaspoon minced fresh ginger root
1/2 teaspoon minced garlic
2 tablespoons chopped green onion
1/4 teaspoon red pepper flakes
3 tablespoons cornstarch
2 tablespoons water
Chicken:
2 boneless, skinless chicken breasts, cut
into 1/2 inch pieces
1 cup all-purpose flour
1/4 teaspoon salt
1/4 teaspoon pepper
3 tablespoons olive oil
Directions:
1. Pour 1 1/2 cups water, orange juice, lemon juice, rice vinegar, and soy sauce into a saucepan and set over medium-high heat. Stir in the orange zest, brown sugar, ginger, garlic, chopped onion, and red pepper flakes. Bring to a boil. Remove from heat, and cool 10 to 15 minutes.
2. Place the chicken pieces into a resealable plastic bag. When contents of saucepan have cooled, pour 1 cup of sauce into bag. Reserve the remaining sauce. Seal the bag, and refrigerate at least 2 hours.
3. In another resealable plastic bag, mix the flour, salt, and pepper. Add the marinated chicken pieces, seal the bag, and shake to coat.
4. Heat the olive oil in a large skillet over medium heat. Place chicken into the skillet, and brown on both sides. Drain on a plate lined with paper towels, and cover with aluminum foil.
5. Wipe out the skillet, and add the sauce. Bring to a boil over medium-high heat. Mix together the cornstarch and 2 tablespoons water; stir into the sauce. Reduce heat to medium low, add the chicken pieces, and simmer, about 5 minutes, stirring occasionally.


BACK TO RECIPES


Sunday, January 23, 2011

Spotlight Sunday

Okay, so I wanted to start a post once a week about just some of the fun things I have seen throughout the week on other blogs. At the end, I want to start a little link party each Sunday. I'm sure it will be small at first, but maybe ..maybe it will grow! Help me out and show me some of your fun things that you've been working on!

Spotlitghts:

**Corker Bows w/a tutorial! A Girl an a Glue Gun

image

**I thought this was fascinating..Chalkboard paint right onto the wall, then frame it! Sand and Sisal

imageimage

**A PDF and tutorial on how to make these little truffle boxes!..at least, that is what I am going to use them for! Today’s Fabulous Finds

image

**Cute, Easy, and Thrifty Valentine’s decoration

image

**I just love this bracelet! Flamingo Toes

image

**2 sites for Toddler Time Ideas: (click on the pictures)

image image

These were just a few of the many things I enjoyed this week!


Okay, on to the LINKY PARTY!

um..rules..
just like all the others...

1. Link anything you have created recently.

2. Link your actual project post. Do not link to your main blog, shop, or etsy store, not to any giveaways or anything else.

okay..guess that’s it!

Oh, I would appreciate if linked back to my blog!

My Swanky Crafts
<div align="center"><a href="http://www.myswankycrafts.blogspot.com" title="My Swanky Crafts"><img src="http://i1095.photobucket.com/albums/i480/ashleedunlap/BlogBUTTON-SS.jpg" alt="My Swanky Crafts" style="border:none;" /></a></div>